
Step-by-Step Tutorial: Activating Windows 11'S System Shield and Safeguards
Step-by-Step Tutorial: Activating Windows 11’S System Shield and Safeguards
System Protection is disabled by default in Windows 10. If it is disabled, Windows is not able to create restore points which allows you to use System Restore to restore the system. So it is necessary to turn on System Protection.
Follow these steps to turn on System Protection:
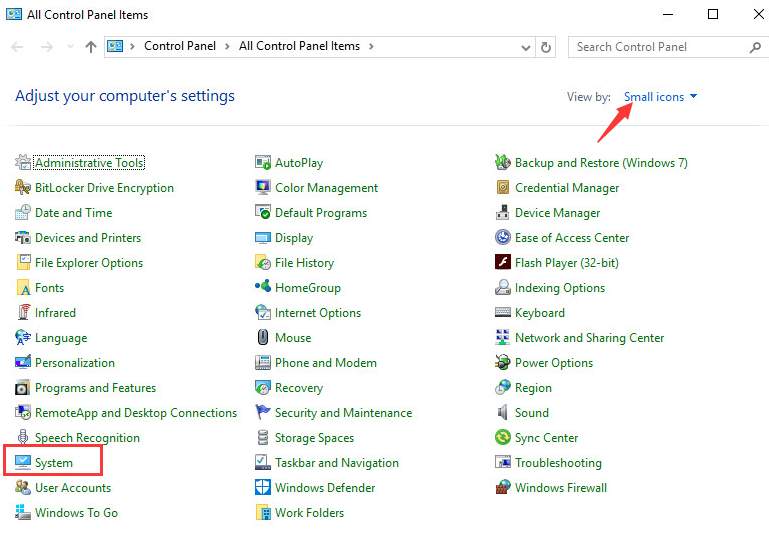
1. Open Control Panel .
2. View by Small icons and click on System .
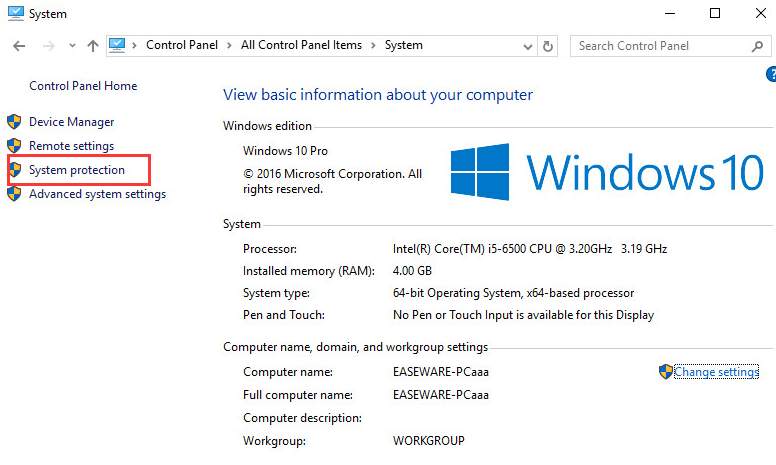
3. ClickSystem Protection in left pane.
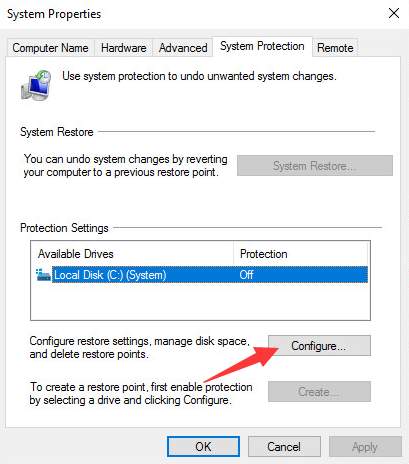
4. Under “Protection Settings” , select the drive that you have Windows installed. (If you didn’t save it to another drive, Windows is installed on C:\ drive by default.) then clickConfigure button.
5. Select optionTurn on system protection and clickOK button.
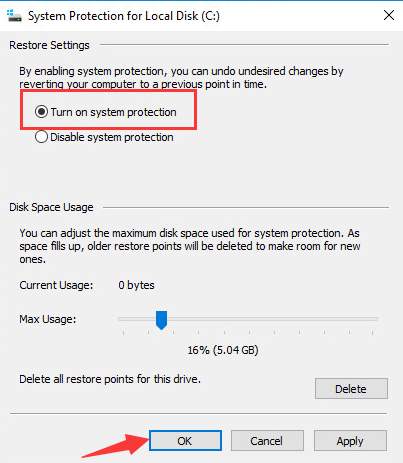
After System Protection is turned on, Windows 10 will create restores points automatiicdally. If you want, you can alsocreate restore points manually .
Also read:
- [New] Creating Engaging Content for Effective Discord Live Streams for 2024
- [New] Mastering YouTube Permanently Stop Video Snips [Complete Guide]
- [Updated] 2024 Approved The Latest in Video Capturing Apeaksoft 2023 Edition Analysis
- [Updated] The Sincere Evaluation of a Digital Audio Player for 2024
- 4 Ways to Fix Android Blue Screen of Death On Vivo X Fold 2 | Dr.fone
- Conserve Battery Life with Ease: Unlock the Secrets of MacOS Monterey's Low Power Feature Explained
- Effortless Strategies for Enhancing Complexity on Your Apple Watch - Tips
- Exploring Apple's Vision: The Enchantment of Tech-Enabled Eyewear - A Deep Dive by ZDNet
- In 2024, 3 Facts You Need to Know about Screen Mirroring Vivo V27 Pro | Dr.fone
- In 2024, How to Make Moments Last Longer Using Phantom's Slow Mo Magic
- In 2024, Pokemon Go Error 12 Failed to Detect Location On Poco C50? | Dr.fone
- Top Rated Notetakers - Comprehensive Reviews & Comparisons | TechRadar
- Top-Rated MagSafe Wallet Reviews - Comprehensive Testing by Tech Gurus
- Title: Step-by-Step Tutorial: Activating Windows 11'S System Shield and Safeguards
- Author: Larry
- Created at : 2025-01-12 16:41:38
- Updated at : 2025-01-13 16:32:51
- Link: https://tech-hub.techidaily.com/step-by-step-tutorial-activating-windows-11s-system-shield-and-safeguards/
- License: This work is licensed under CC BY-NC-SA 4.0.