
Step-by-Step Guide: Switching Keyboard Layouts in Windows 11

Step-by-Step Guide: Switching Keyboard Layouts in Windows 11
Quick Links
- How to Change Your Keyboard Language
- How to Change Your Keyboard Layout
- How to Remove a Keyboard Language or Layout
Key Takeaways
- To change your keyboard language, navigate to Settings > Time & Language > Language & Region > Add a Language, then install and select a language.
- You can also change the keyboard layout for your language by selecting “Language Options” in “Language & Region” and selecting “Add a Keyboard.”
- To remove a language or keyboard layout, open to the “Language Options” page, click the three-dot menu icon next to the language and select “Remove.”
Whether you work with international clients or just want to impress your friends, you might encounter situations that require you to type in another language. Fortunately, navigating between keyboard layouts and typing in your desired language is a breeze on Windows 11.
How to Change Your Keyboard Language
During the Windows 11 setup process, you’ll be asked to choose your preferred keyboard language. This will become the default language for your computer. However, you can easily install additional keyboard languages and switch between them through the Windows Settings app.
To add a keyboard language, press Windows+i to open the Settings app (there are other ways to launch the Settings app on Windows ).
Select “Time & Language” from the left sidebar, and then click “Language & Region” in the right pane.
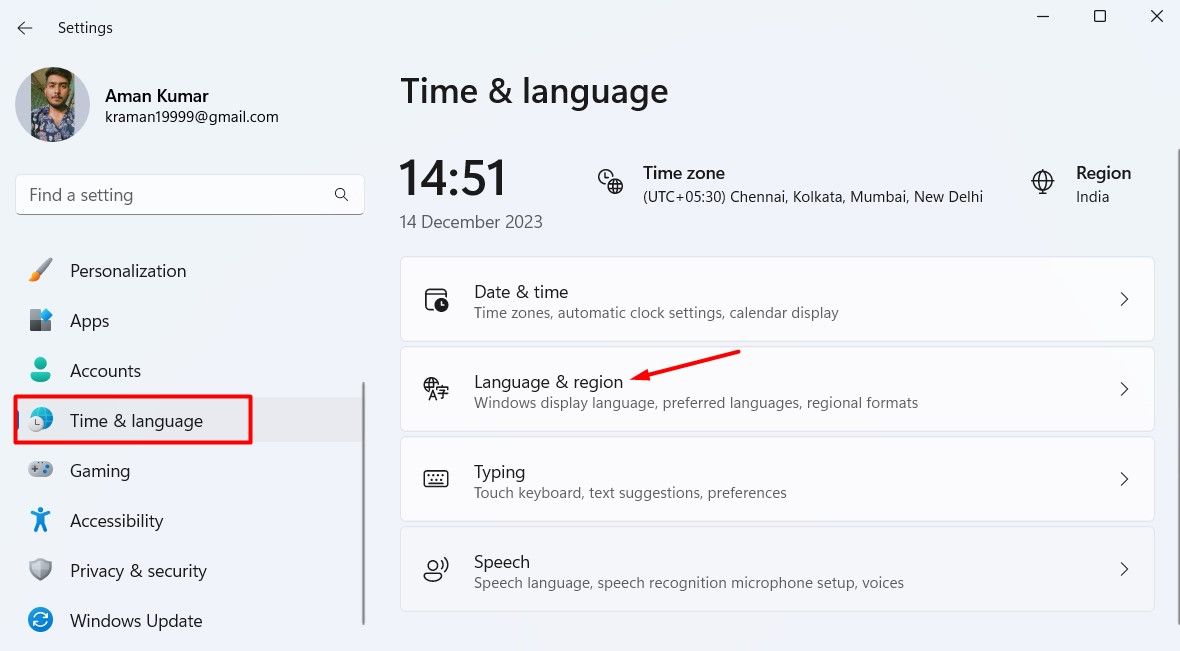
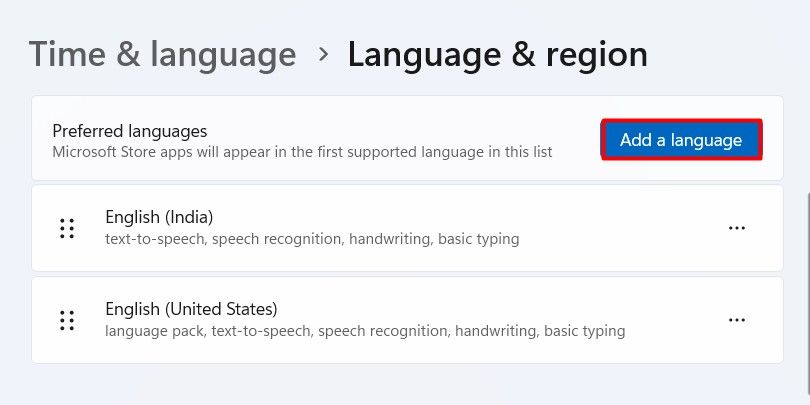
Click the “Add a Language” button.
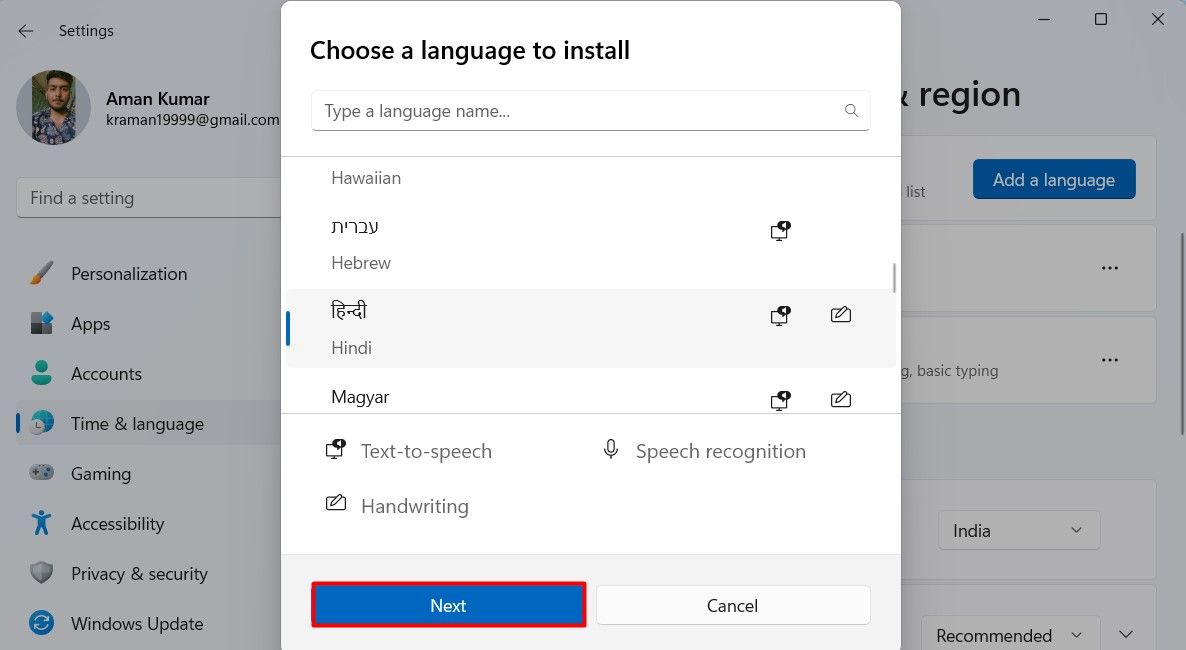
Choose the language you want to install and then click the “Next” button.
Click “Install” to begin the installation process.

Once your language is installed, you’ll see it listed under the Languages section. You can then click the language icon on the taskbar and choose the language you want to use.
![]()
Alternatively, you can press the Windows+ Spacebar or Alt+Shift keys together to switch the language on your Windows computer.
How to Change Your Keyboard Layout
Different languages have different keyboard layouts that are automatically installed when you install the language. However, the default layout for your language might not always be the best option for you.
In this case, you can choose from different layouts available for your language and install the one that best fits your typing habits. To install a different layout for your language, open the “Settings” app and navigate to Time & Language > Language & Region.
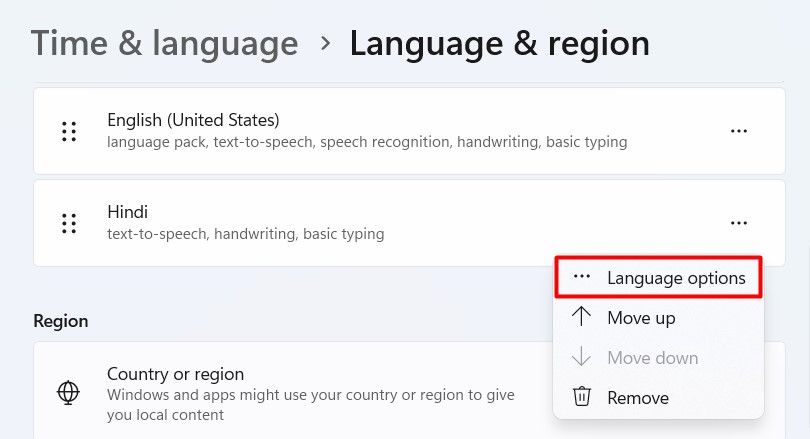
Click the three dots next to your language and select “Language Options” from the menu that appears.
Click the “Add a Keyboard” button next to Installed keyboards.
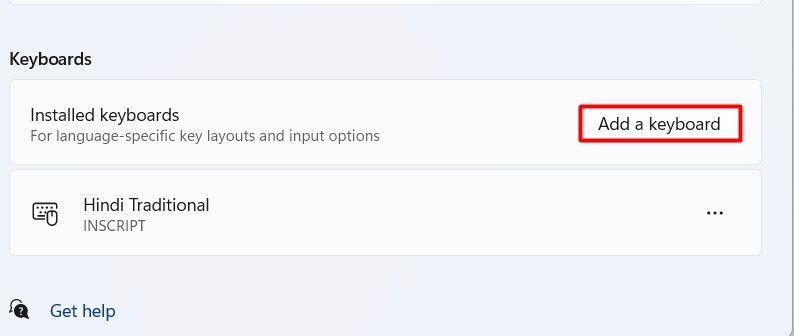
Choose the layout of your choice to install it. You can use the on-screen keyboard to see how the selected layout will work on your computer.
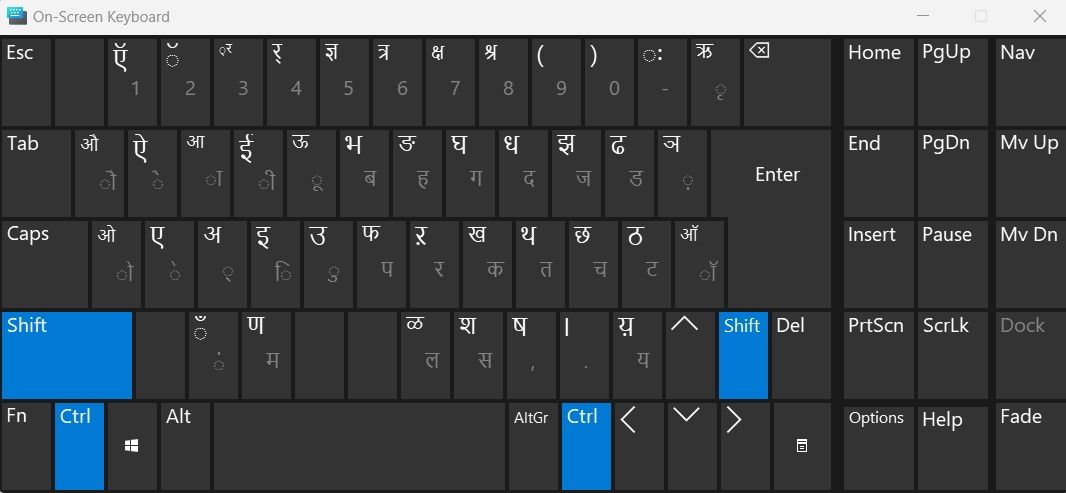
Once you’ve finalized a layout, you can remove the other keyboard layouts for your language.
How to Remove a Keyboard Language or Layout
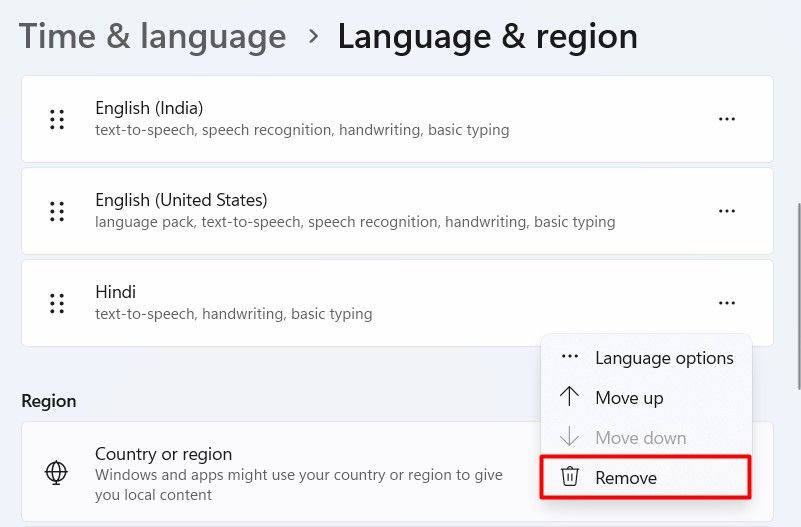
If you no longer use a language on your computer, you can remove it to avoid accidentally switching to it. To remove a keyboard language, launch the Settings app and head towards Time & Language > Language & Region.
Click the three dots next to the language you want to remove and then choose “Remove” from the menu that appears.
A prompt will appear asking you to confirm whether you want to remove the selected language. Click “Yes” to confirm.
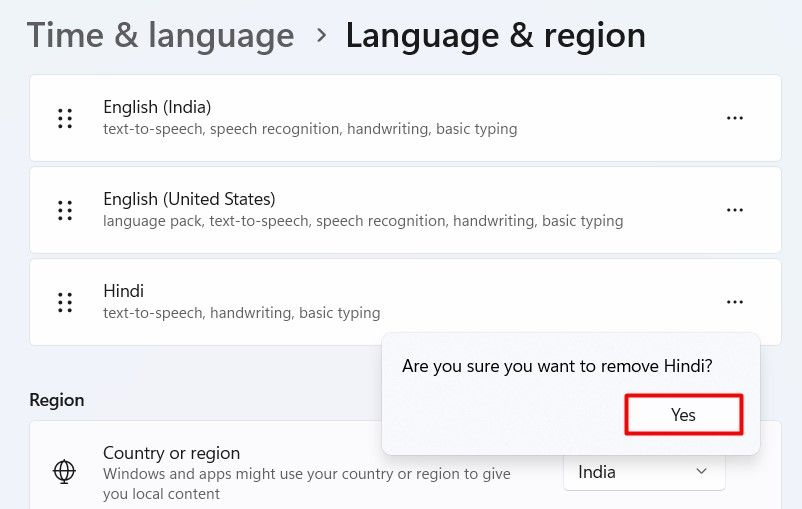
That’s all! The selected language is now removed from your computer.
As we mentioned before, a language can have multiple keyboard layouts. If you don’t like a particular layout for your language, you can remove it. To do this, click the three dots next to the language whose layout you want to remove and choose “Language Options” from the menu.

Under the Keyboards section, click the three dots next to the layout you want to remove and choose “Remove” from the menu that crops up.
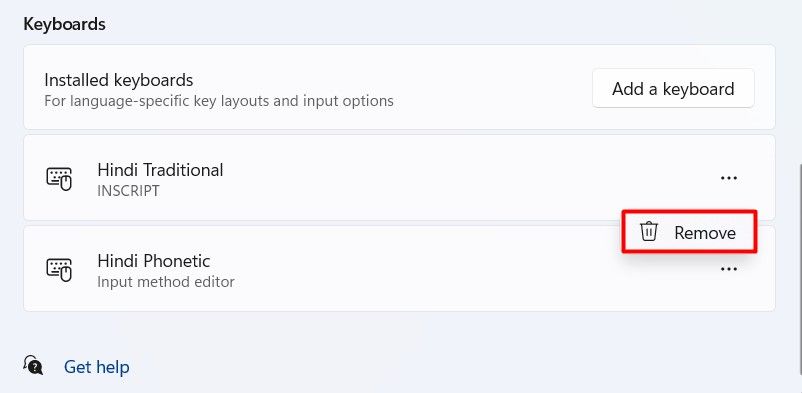
If you want to delete multiple keyboard layouts, just repeat the above process for each layout you wish to remove.
This was everything you needed to know about changing your keyboard language and layout on Windows 11. If you’re new to Windows, you might be interested in learning some basics, like how to disable the touchpad or how to disable keyboard sound .
Also read:
- [Updated] 2024 Approved Bridging the Gap Between Facebook Videos and Apple TV Compatibility
- [Updated] The Audio Avenger Your Pathway to Sound in Story Posts
- 2024 Approved Seeking Excellence Prime Free SRT Online Translators Guide
- Adapting ChatGPT for Personalized Prose: Strategies to Match Your Penmanship
- AI at the Helm: Unveiling the Top 8 Productive Chrome Extensions
- AI Enhanced Solutions for HR Efficiency
- AI-Powered Quests: Redefining Microsoft's Bing Experience
- Expert Guide: Why WinX MediaTrans Is the Preferred Choice for Effortless Cross-Platform Content Movement on iOS & PC
- Facing ChatGPT Body Stream Issue? Here Are Seven Effective Fixes to Try Out!
- In 2024, How To Fix Apple iPhone 13 Could Not Be Activated/Reached Issue
- Microsoft Store Locked? Here's Your Path Forward
- Top 6 Must-Have Party Essentials for Unforgettable Outdoor Celebrations - Insights From ZDNet
- Title: Step-by-Step Guide: Switching Keyboard Layouts in Windows 11
- Author: Larry
- Created at : 2024-12-24 11:59:42
- Updated at : 2024-12-27 17:39:13
- Link: https://tech-hub.techidaily.com/step-by-step-guide-switching-keyboard-layouts-in-windows-11/
- License: This work is licensed under CC BY-NC-SA 4.0.