
Repair Your Computer in Windows 11 Automatically
The Ultimate Tutorial on How to Modify Your Username in Windows 10 Easily

Want tochange the account name of your Windows 10 computer ? Don’t worry. It’s easy and there are different ways to do that. We’ve put together 3 methods for how to change your user name on Windows 10. Read on and find how…
Try these methods
- Change your user account name in Control Panel
- Change your user account name in Local Users and Groups
- Change your user account name in Settings
You won’t be able to change the account name on the computer in your office if your account isjoining to any domain .
Method 1: Change your user account name in Control Panel
You can change a lot settings of Windows system throughControl Panel , including changing your account name.
Here’s how:
- On your keyboard, hold down theWindows logo key , then pressR to bring up the Run box.
- Typecontrol and pressEnter .

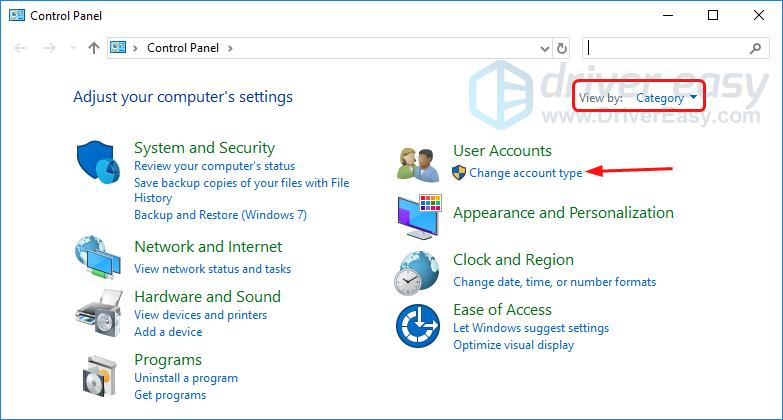
- ClickChange account type underUser Accounts when View byCategory selected.
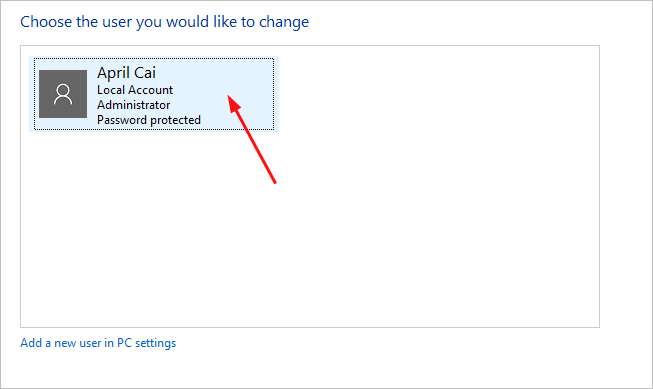
- Double-click the account you want to change the user name.
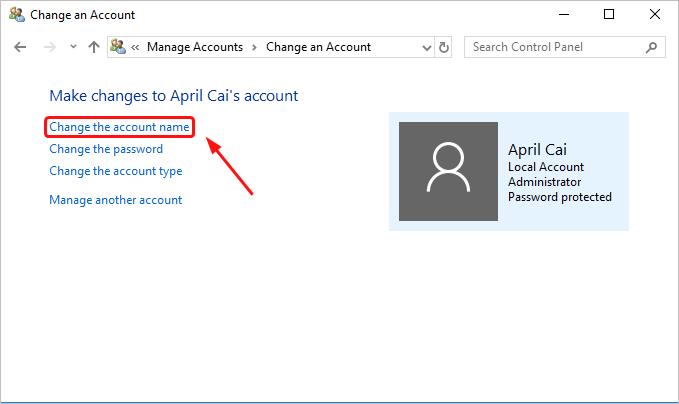
- SelectChange the account name .
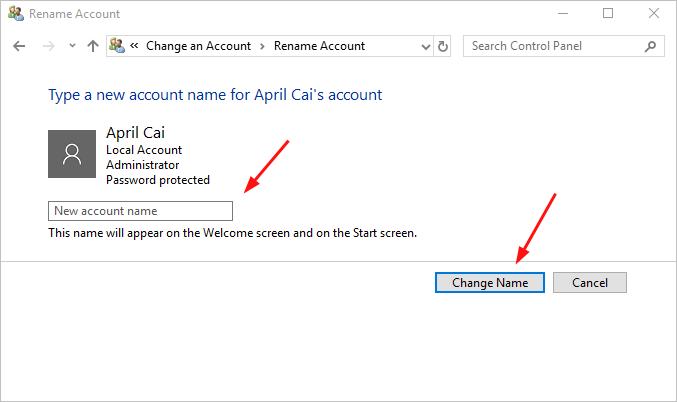
- Type the new name into the New account name box, then clickChange Name .

You’ll then see your account shows with the new name.
Method 2: change your user account name in Local Users and Groups
You can create and manage users and groups that are stored locally on your computer throughLocal Users and Groups , including changing your account name.
If your computer is runningWindows 10 Home , you won’t have access to Local Users and Groups, please try other methods to change your user account name.
Here’s how you can do that:
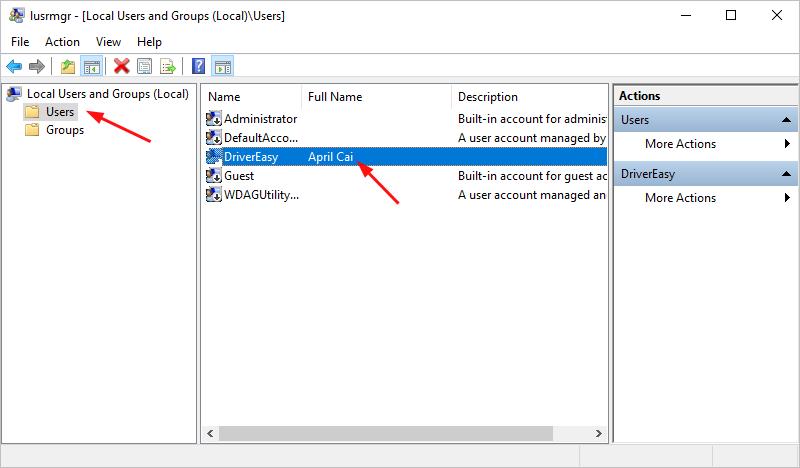
- On your keyboard, hold down theWindows logo key , then pressR to bring up the Run box.
- Typelusrmgr.msc and pressEnter .
- You’ll then see the Local Users and Groups window. ClickUser then double-click the user account which you want to rename.
- Type the new name in theFull name box. Then clickApply >OK .

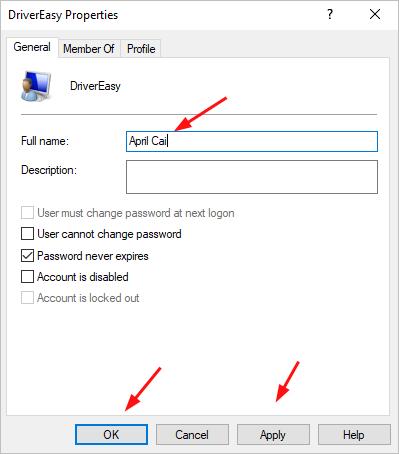
The new name is set successfully.
Method 3: Change your user account name in Settings
If you log in your Windows 10 computer with aMicrosoft account , you can change your account name in Settings. Go with these following steps:
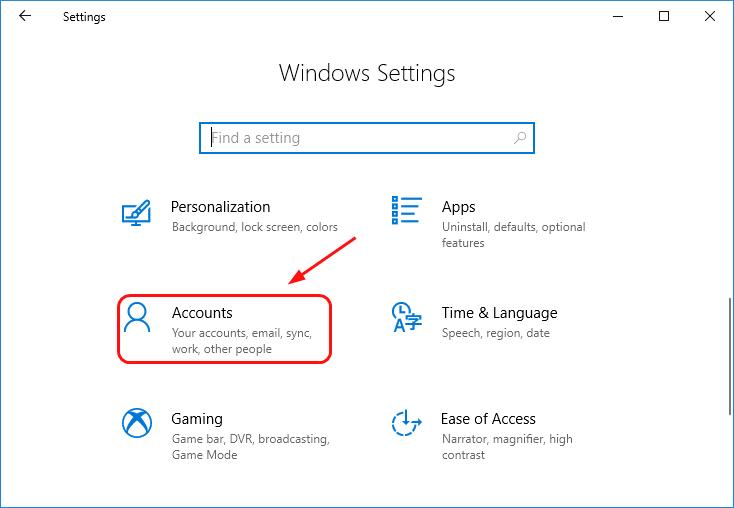
- On your keyboard, hold down theWindows logo key, then pressX to bring up the quick-access menu.
- ClickAccounts .
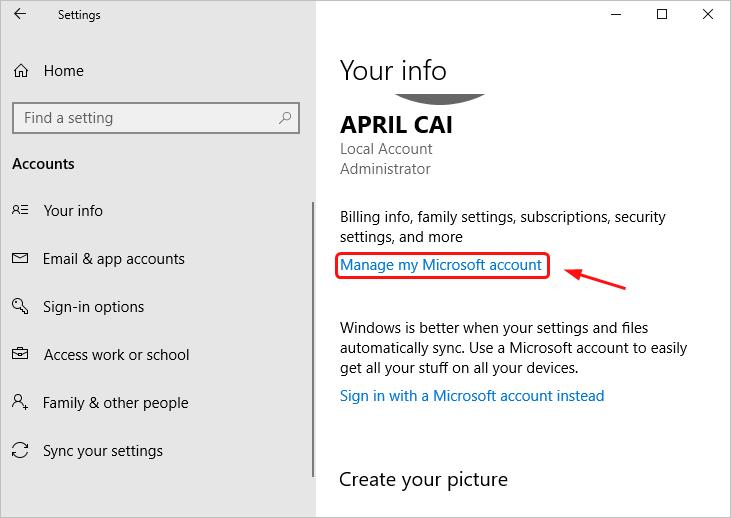
- Click Manage my Microsoft account .
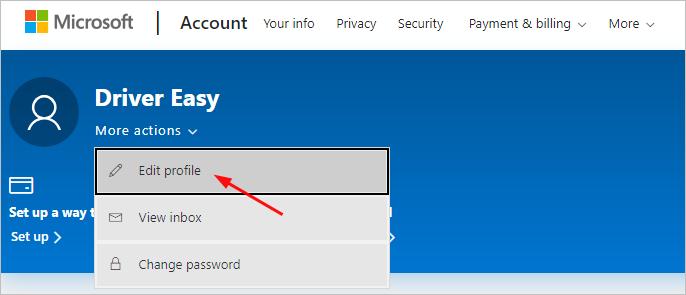
- On the open page, click the drop-down menu ofMore options under your Microsoft account. Then selectEdit Profile .
- ClickEdit name .
- Type the new name into the box and enter the characters you see for verification. Then clickSave .
Please note that this will change the account name of your Microsoft account.

The new account name of your Windows 10 computer is set successfully.
Tada! You own a new account name for your Windows 10 computer now. Feel free to comment below for any questions.
Also read:
- 1. Upgrading Your Apple Studio Display: A Step-by-Step Guide to the Latest Firmware
- Expert-Approved iPhone Hacks! Transform Your Device Using Stealthy Voice Shortcuts - Featured on ZDNET
- How to Stop Life360 from Tracking You On Honor Play 8T? | Dr.fone
- In 2024, How Can I Catch the Regional Pokémon without Traveling On Oppo K11 5G | Dr.fone
- In 2024, Mastering Drone Image Shake Reduction
- Navigate Smarter in Style – Discover the Power of ChatGPT Voice Command in Your Mercedes Benz!
- Navigate the Future of Web Engagement: 7 Must-Have ChatGPT Tools for Google Chrome Users
- Navigating Through ChatGPT: Discovering Potential Uses for Advanced Generative AI Solutions
- Nine Distinctive AI Applications Revolutionizing Note-Taking
- Overcoming Spreadsheet Anxiety: Integrating ChatGPT Into Excel
- Top Solutions: How to Correct the Yellow Discoloration on Your iPhone Display
- Title: Repair Your Computer in Windows 11 Automatically
- Author: Larry
- Created at : 2025-03-04 17:25:21
- Updated at : 2025-03-05 16:18:59
- Link: https://tech-hub.techidaily.com/repair-your-computer-in-windows-11-automatically/
- License: This work is licensed under CC BY-NC-SA 4.0.