How To Install Chipset Drivers Effectively: Insights Into Purpose And Setup Procedures

How To Install Chipset Drivers Effectively: Insights Into Purpose And Setup Procedures
Quick Links
Key Takeaways
- Chipset drivers are essential for your computer to function properly, as they allow the operating system to communicate with various components. Updating them can improve hardware compatibility, security, stability, and performance.
- Updating chipset drivers can reduce random stuttering by optimizing how your CPU, RAM, and storage communicate.
- To update chipset drivers, identify your motherboard chipset, download the latest drivers from the motherboard manufacturer’s website, and install them. Manually check for updates every few months to ensure your system stays up-to-date.
If you’re anything like me, you like to keep your computer running at its best. One way to optimize your PC is by updating drivers. While many of us keep our graphics card drivers up-to-date, we tend to overlook chipset drivers. Let’s explore what they are, why they’re important, and how to update them.
What Are Chipset Drivers?
A chipset is a set of chips integrated into your motherboard responsible for handling communication between different components inside your computer. Some call the chipset your computer’s “glue.” It controls parts like your RAM, storage, and USB slots, but it also manages data flow and voltage regulation. In practical terms, your chipset determines whether you can overclock your RAM and CPU , assuming the parts are unlocked for overclocking. For instance, AMD A-series chipsets traditionally don’t allow for manual overclocking.
Chipset drivers are a type of software that allows your chipset to communicate effectively with your operating system. Drivers are often referred to as “translators.” Without any chipset drivers, your computer wouldn’t work correctly; the operating system wouldn’t be able to detect all of your computer parts, and you would probably face stability issues. All operating systems auto-detect and install chipset drivers in the background to ensure everything works correctly, and you’re none the wiser that it ever happened.
However, just because your operating system has installed the chipset drivers doesn’t necessarily mean that they’re the right ones. You should still go out of your way to update to the latest version.
Why Chipset Driver Updates Matter
Truth be told, you don’t have to install the latest chipset drivers, but there are a few good reasons why you should. For starters, installing chipset drivers improves compatibility. New models of NVMe SSDs, RAM, and other components come out all the time. Updating to the latest BIOS is only one side of the equation—you also need the latest chipset drivers to ensure every component works correctly. Unlike BIOS updates, chipset updates are risk-free and entirely done within the operating system.
More importantly, updated chipset drivers improve security, stability, and performance. Look at any chipset driver release notes, and you’ll likely see “bug fixes,” along with other minor improvements. While chipset drivers don’t necessarily increase your average FPS, they can slightly reduce random stutters by improving 1% and 0.1% lows . This is because the updated drivers optimize how your CPU, RAM, storage, and other parts communicate.
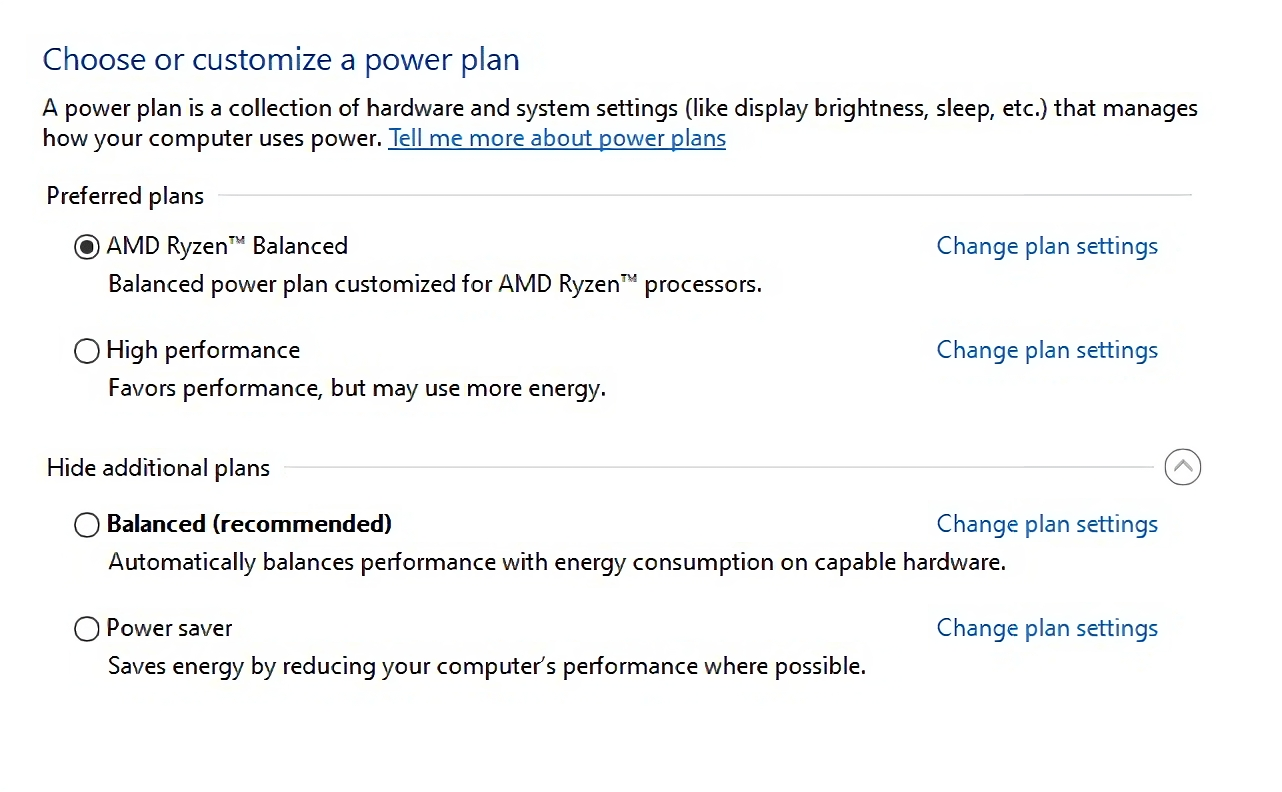
Updating chipset drivers can also bring support for new programs and features. A great example is Ryzen’s power plans, which slightly improve performance by fixing Windows CPU usage on older Ryzen CPUs.

How to Update Your Chipset Drivers
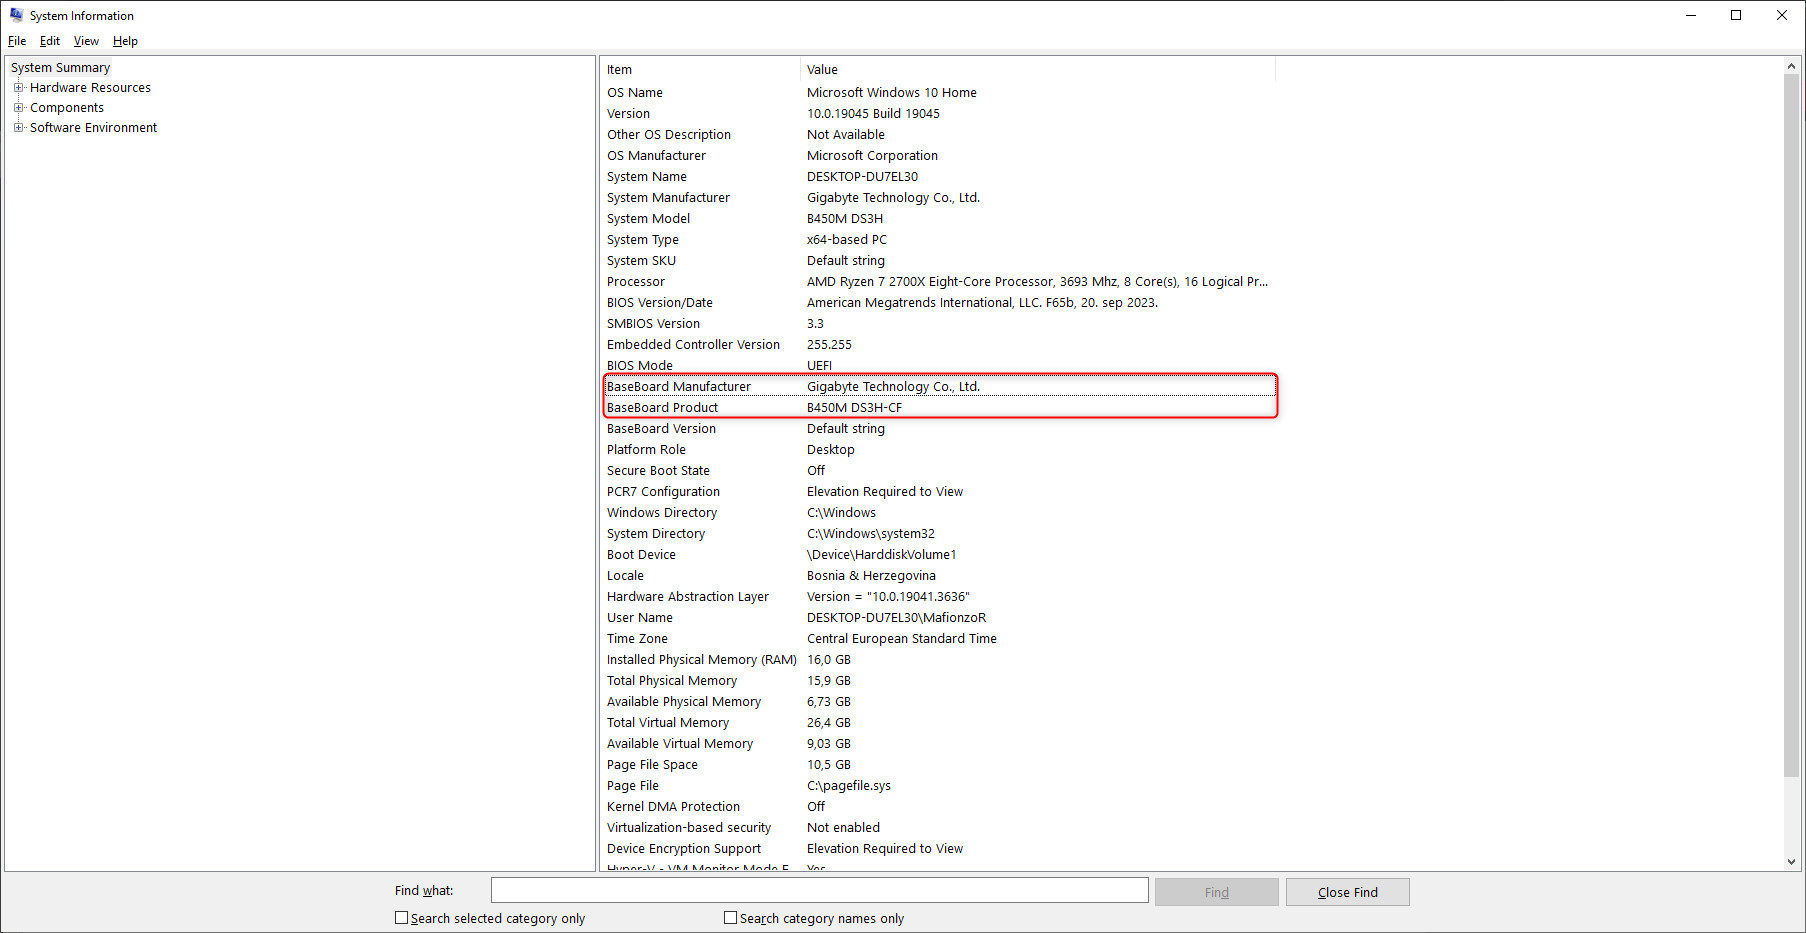
To update your chipset drivers, start by identifying your motherboard chipset. The chipset is in the first part of your motherboard’s model name—for instance, I have a Gigabyte B450M DS3H motherboard, so my chipset is the B450.
If you don’t know your motherboard’s model name, you can quickly check by opening the Start Menu, searching for “System Information,” and clicking the app. You’ll see the motherboard manufacturer and model name next to “BaseBoard Manufacturer” and “BaseBoard Product.”

If you’re on AMD, you can grab the chipset drivers either from the motherboard manufacturer or AMD’s support website directly. I recommend going to AMD’s website because they’ll always have the latest version available. On AMD Drivers and Support, search for your chipset or select Chipsets > Your CPU Socket > Your Chipset. Download and install the drivers, then restart your computer.
If you’re on Intel, there’s a good chance that Windows has already downloaded and installed the optimal drivers for your chipset. But there’s no reason why you shouldn’t try installing the latest drivers anyway. Intel’s Driver Support website doesn’t have any chipset drivers, but rather a Chipset INF Utility that gives the operating system the name of the chipset, which isn’t of much practical use. Instead, you should go to your motherboard manufacturer’s website, find your exact motherboard model, open the support page, and download the latest chipset drivers from there. Install the drivers, restart your system, and you’re done.
Since chipset drivers don’t update automatically, manually check for updates every few months to keep your system up-to-date.
Congratulations on updating your chipset drivers! You can now get the most out of your hardware and you might have even unlocked exciting new features.
Also read:
- [New] Amalgamate PPTs for Video Creation
- [Updated] 2024 Approved Navigating Through EZ Grabber's Features
- [Updated] In-Depth Exploration How to Closely Inspect Roblox Environments
- [Updated] Unveiling the Secrets of Striking YouTube Live Images for 2024
- 2024 Approved Best YouTube Thumbnail Size How to Make a Thumbnail for YouTube
- Accelerate HR Routine Jobs with These 5 AI Prompts
- AI and Human Judgment: Exploring 6 Reasons to Think Twice Before Trusting Blindly
- AI Revolutionizes Personal Trainer Routines: Crafting Individualized Exercise Plans with ChatGPT
- AI Rivalry Decoded: Exploring the Ten Fundamental Differences Between Microsoft's Bing and ChatGPT Technologies
- Pattern Locks Are Unsafe Secure Your Realme 11 Pro Phone Now with These Tips
- Secure Your Chat Privacy: A Step-by-Step Guide to Opting Out of ChatGPT
- Title: How To Install Chipset Drivers Effectively: Insights Into Purpose And Setup Procedures
- Author: Larry
- Created at : 2024-12-22 06:20:36
- Updated at : 2024-12-28 04:00:33
- Link: https://tech-hub.techidaily.com/how-to-install-chipset-drivers-effectively-insights-into-purpose-and-setup-procedures/
- License: This work is licensed under CC BY-NC-SA 4.0.