
Creating a Recovery Point with Ease: A Windows 11 User's Manual
Creating a Recovery Point with Ease: A Windows 11 User’s Manual
To do a System Restore in Windows 10, you need to create a restore point first. Just follow steps below to create a restore point in Windows 10.
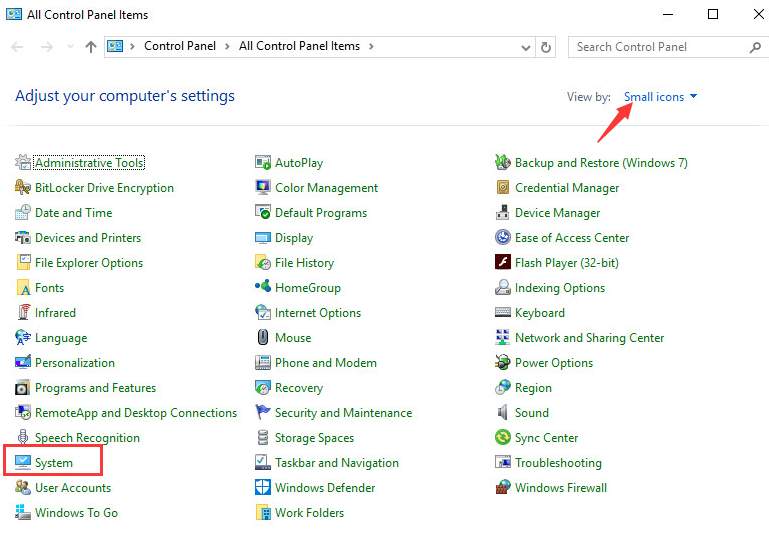
1. OpenControl Panel .
2. View bySmall iconsand click onSystem.
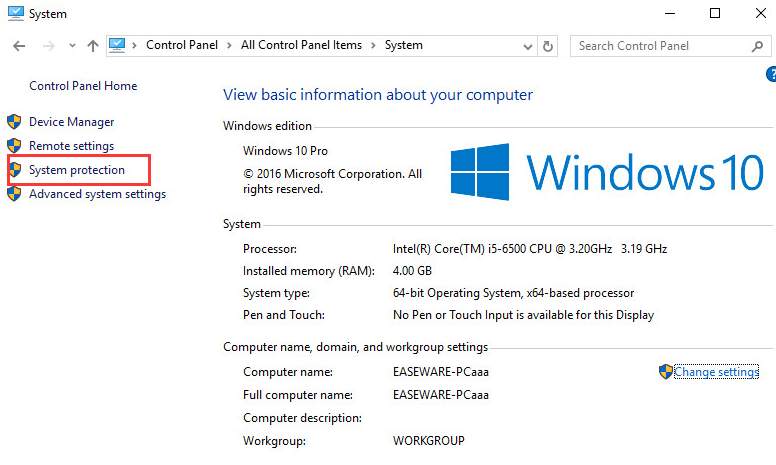
3. ClickSystem Protection in left pane.
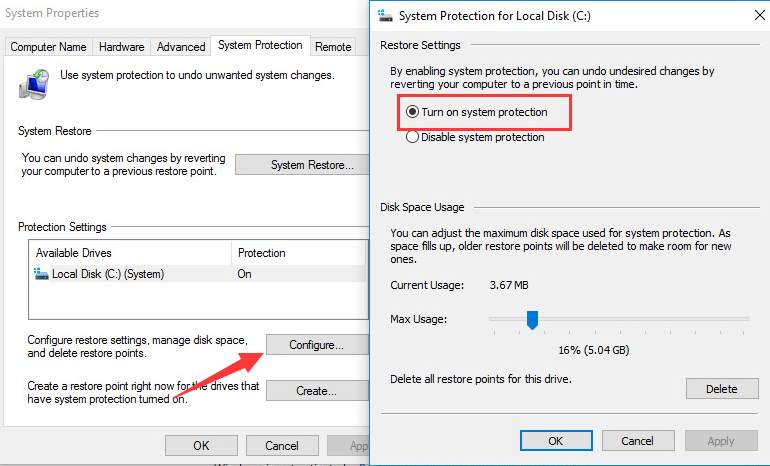
4. UnderProtection Settings, ensure theProtectionfor the drive that you want to create a restore point is On (Note the drive must have Windows installed on.).

If not, select the drive and clickConfigure to turn it on.
5. ClickCreatebutton.
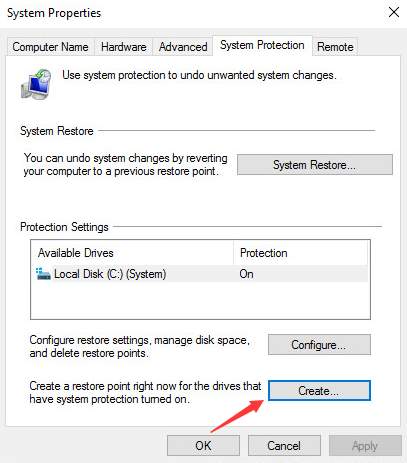
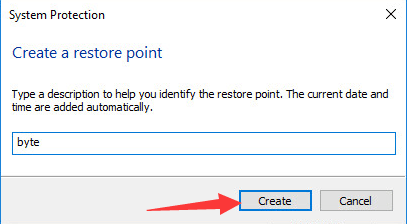
6. Type a description in the box, which will help you identify the restore point. (In my case, I type “byte”.) Then clickCreate button. After that, Windows will start creating the restore point.
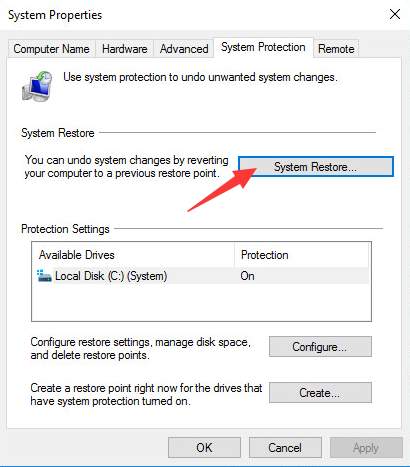
If you want, you can check whether the create point is created successfully:
Open System Properties again and clickSystem Restore .
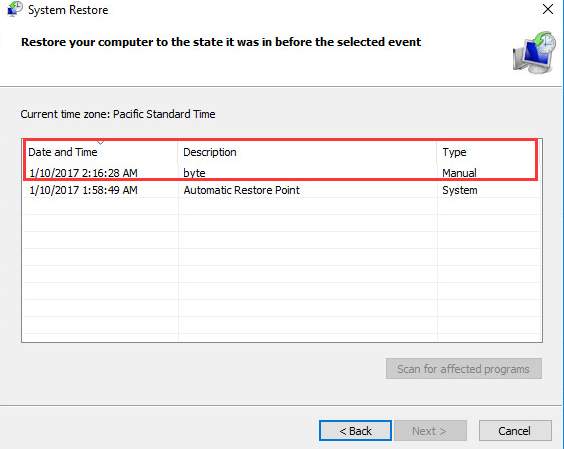
In my case, the “byte” restore point has been created successfully.
Also read:
- [Updated] 2024 Approved Proven Strategies Maximizing Efficiency in Your Mobizen Screencast Processes
- [Updated] 2024 Approved Quick Fixes for Missing Sound in OBS
- [Updated] Essential Rules of Engagement on YouTube
- [Updated] Velocity for the Visionary Quick-Frame Android Tools for 2024
- Boost Your Productivity with Swift: The Power of macOS Spotlight Suggestions Unveiled
- Decoding Technology: Tom's Guide
- DOJ's Legal Battle Against Apple: Unpacking the Consequences for iOS Users and Developers | Expert Analysis
- In 2024, Innovation in Minimization The Finest Selection of 43 Mobile Video Trimming Apps
- In 2024, Is pgsharp legal when you are playing pokemon On Oppo A2? | Dr.fone
- IPhone 15 Pro vs iPhone 13 Pro Comparison: Is It Time for the Upgrade?
- IPhone 16 Vs. IPhone 15 Comparison: Essential Considerations When Choosing Apple's Newest Base Model | ZDNET Insights
- New In 2024, S Best Free Video Editors for Recording Gameplay
- Professional Video Creation on Your iPhone with Apple's Latest Update: Introducing Final Cut
- TikTok Age Update Made Simple User-Friendly Techniques
- Top-Rated Mac Enhancement Tools of 2022: Expert Picks
- Unveiling Apple's Enhanced AirPods: Top 4 New Features Revealed by Tech Giant
- ZDNet's Curated List of Premium MagSafe Wallets in 2E24: In-Depth Testing and Analysis Unveiled
- Title: Creating a Recovery Point with Ease: A Windows 11 User's Manual
- Author: Larry
- Created at : 2025-01-12 16:00:46
- Updated at : 2025-01-13 16:12:46
- Link: https://tech-hub.techidaily.com/creating-a-recovery-point-with-ease-a-windows-11-users-manual/
- License: This work is licensed under CC BY-NC-SA 4.0.